Using Custom executables in Steam applications
Advertisement
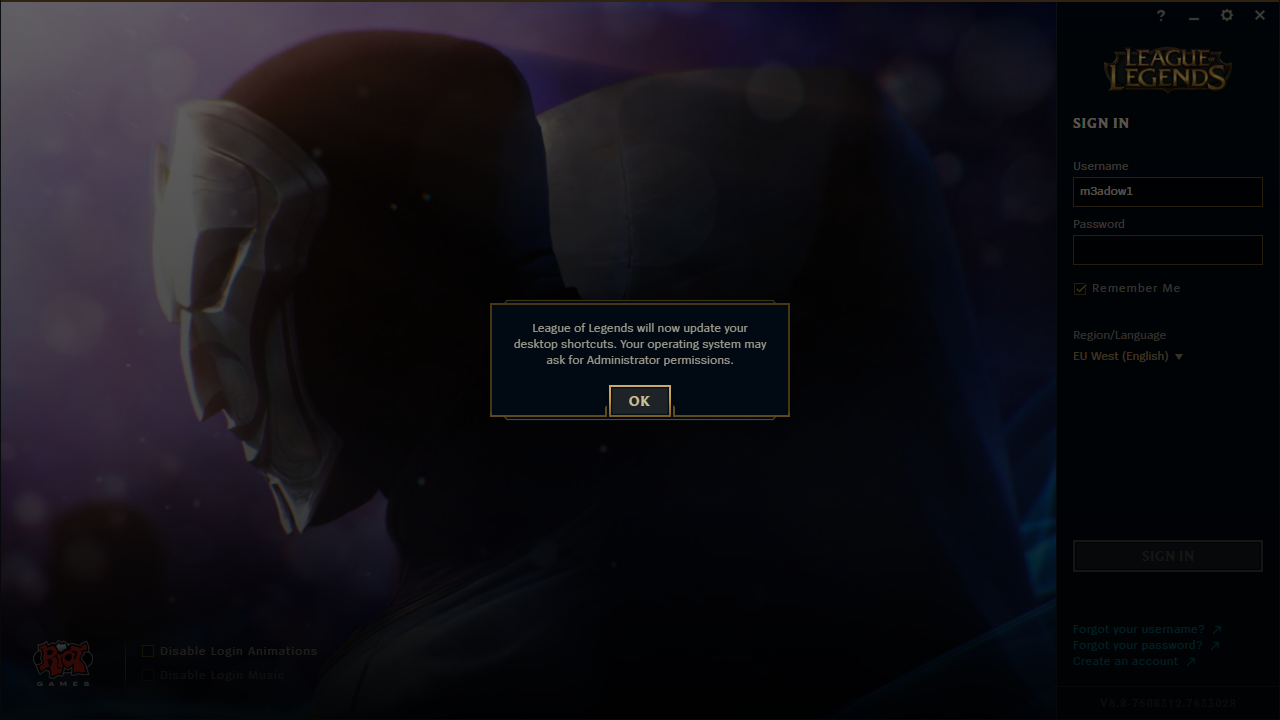
Nearly 10 years ago, on the 30th December of 2009, I bought League of Legends on Steam. Back in this time, DOTA 2 wasn’t released yet and there was a Digital Collectors Edition for League available on Steam. Therefore, I’m one of the very few users who are playing League of Legends via Steam. But while the League of Legends client was further developed, the game version in Steam did not. Luckily, the small Steam League of Legends community found workarounds, so the tracking of ingame time still works. A couple of months ago, Riot Games, the company behind League of Legends did a major overhaul of the client, renaming the game launcher in the process. This, in connection with the workaround install of League of Legends in Steam lead to an popup message every time the game was started via Steam shortcut:
League of Legends will now update your desktop shortcuts. Your operating system may ask for Administrator permissions.
While I’m not playing League frequently anymore, this popup still annoyed me. As other players also encountered this problem and simply renaming the executables didn’t work, I did some tinkering and incidentally found a solution which probably enables the easy usage of custom executables for every Steam game.
Advertisement
The solution is quite easy. We replace the old .exe with a symlink of the CMD and use Steams inbuilt launch options setting to specify the path of the new executable. I’ll do the example instructions for my League of Legends case, but most likely this method can be applied to every game.
Basic Instructions
Prerequisite: Know basic Windows stuff, like the command line and what to find in which path.
- Find out the .exe Steam is starting by default and rename it, e.g. by adding a .org extension. In my “ancient League of Legends installation” case, this is
lol.launcher.exein the base installation directory of League of Legends. - Create a symlink from the Windows CMD to said executable. Type this in the Windows CMD. Replace the path to the game and the name of the executable accordingly. Depending on where you installed Steam and the game you want to change, it’s possible you need a CMD with Admin permissions for that step. If you don’t know how to do that, you might find some useful instructions here.
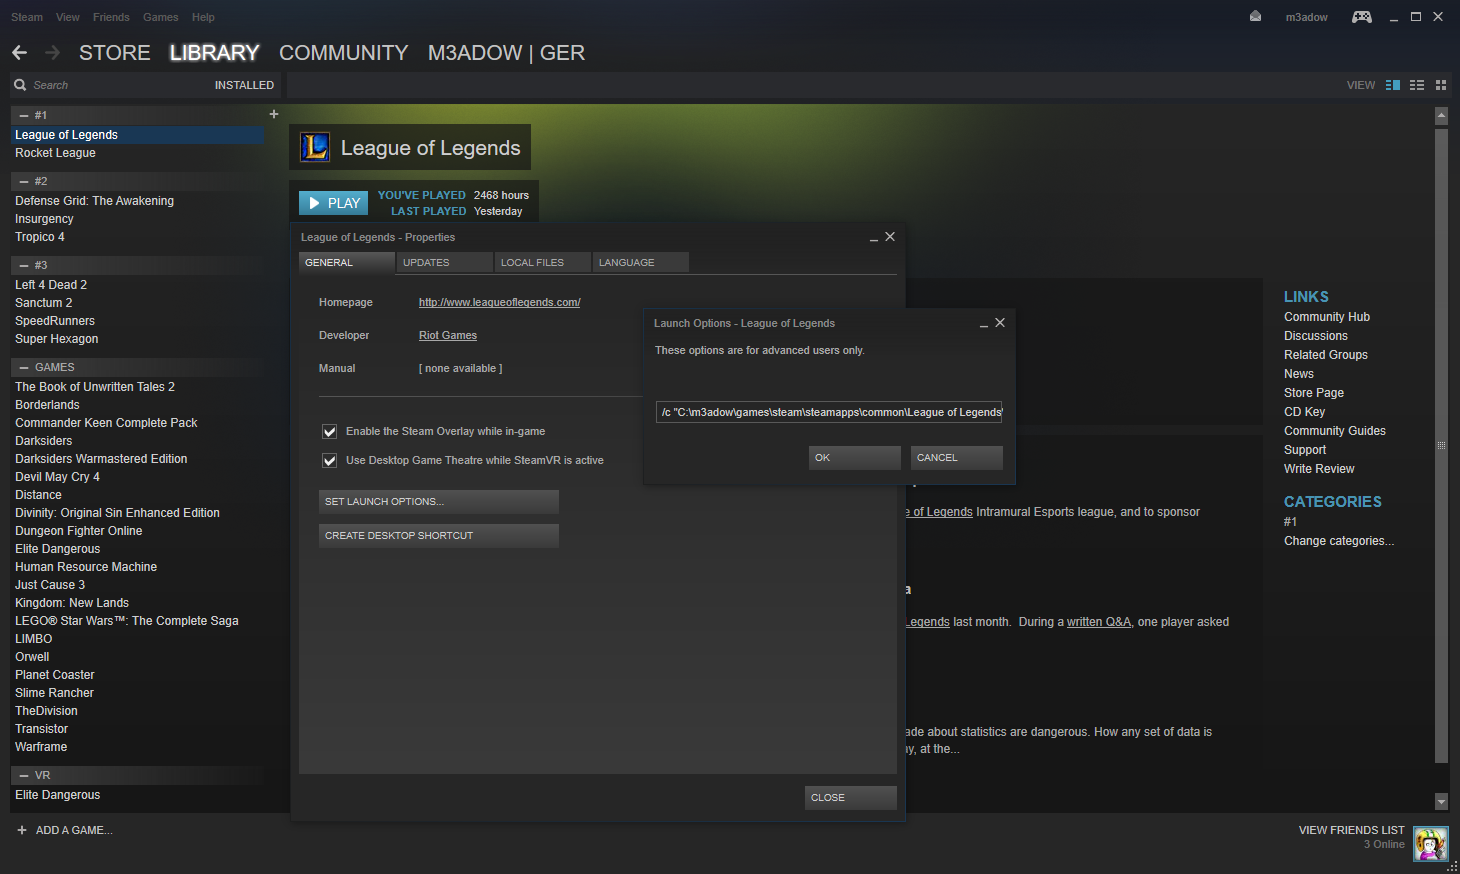
mklink "c:\m3adow\games\steam\steamapps\common\League of Legends\lol.launcher.exe" c:\Windows\System32\cmd.exe - In Steam, go to the “Launch Options” of the game (Right click on the game -> Properties -> “Set Launch Options” in the General tab). Enter
/cfollowed by the path to your new executable in double ticks. In my case, it looks like this:
/c "C:\m3adow\games\steam\steamapps\common\League of Legends\LeagueClient.exe"
That’s it! It’s now possible to properly launch the game. Steam still detects you as ingame, while a different executable is used.
Advanced usage
I’m not certain if normal launch options (like -windowed , -noborderor -novid for some games) can just be put after the call to run the game itself. Also, I’m not sure if it is possible to run games in different directories. If you have such a use case and the basic method didn’t work, this might help you.
- Create a batch file somewhere which uses
startto launch the executable you want to launch:
start /D "c:\anotherpath\" "" /WAIT "c:\anotherpath\anotherexe.exe" -noborder -novid
- Instead of entering the path to the other executable in the launch options, enter the path to the newly created batch file.
Theoretically that batch should enable advanced usage. The batch file is started, starts the new executable, then waits in the background until it’s terminated again. As I did not have the requirement, I haven’t tested this method yet. Therefore this might need some tinkering and research on your side.
If you had some success with either method or if you stumbled upon problems, feel free to comment.

